Running New application wizard in Pega Platform version 7.4 is somewhat different from previous version of Pega Platform. Pega has simplified application creation.
Some major changes that we have found are below
- No Application Description is asked.
- Only 2 Type of application structure is there: Framework and Implementation. In previous Pega 7 there was one more option - framework and Implementation both
- During Implementation NO BUILT ON application is asked.
- Advanced configurations also has some minor changes like it does not ask for Project methodology anymore
- Application wizard does not ask for Business objectives
- It does not ask for Case Types to create
- It does not ask for Data Types to create
- It does not show preview of Rules to be created
- It does not create default operator IDs by itself
Lets have closed look of New Application Wizard for Pega PRPC v7.4
Running New Application wizard for Custom App
For this demo we are choosing Custom as type of Application. We will cover other applications types in separate demo
Step 1 - Start Pega Server and login to administrator application with username as administrator@pega.com and password: install
Step 2 - Click on a down arrow near application name in header and click on "New Application".
Step 3 - On Clicking "New Application" a new tab will open in designer studio. This will ask for type of application which we want to select. For this demo we will select "Custom". It will create a blank application with no case types and no data types included by default.
Once you will select your Option, which is Custom for this demo, It will show you description of Custom application Type. After reading description you can click on "Use this application type" to confirm your choice of application.
Step 4: New application wizard will ask for the primary device for which you are building application. We want our application to be device independent, so we will select Responsive option for this demo
Step 5 - Choose the color scheme of your new Pega 7.4 application. We are selecting Default for this demo
Step 6 - Enter name of application. Now here comes the main task to set up basic class structure of application, by configuring advance configuration. Although application wizard can finish up with default options, but it is always recommended that you configure advance application options before clicking create application
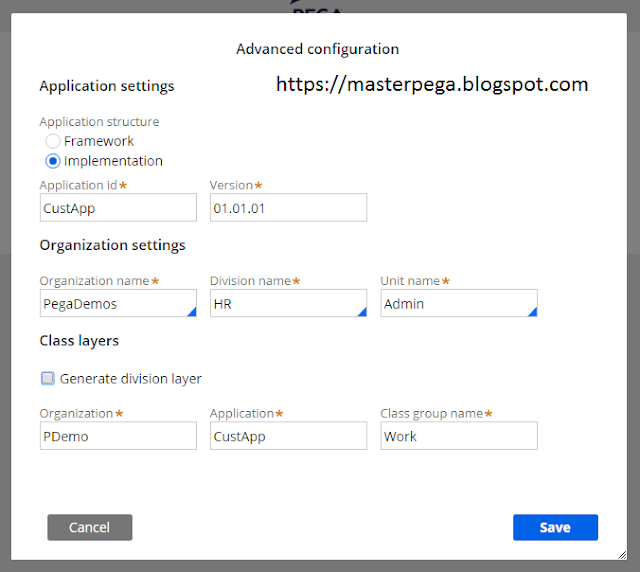
On Click of advance configuration a pop up window will appear. You can configure Application settings, organisational settings and Class structure. Class structure is dependent on application settings
- In application settings we can configure application structure, application ID and application version
- Organisation Setting - We are assuming by the time you will run application wizard, business requirements will be gathered and analysed enough to provide organisation , division and unit names.
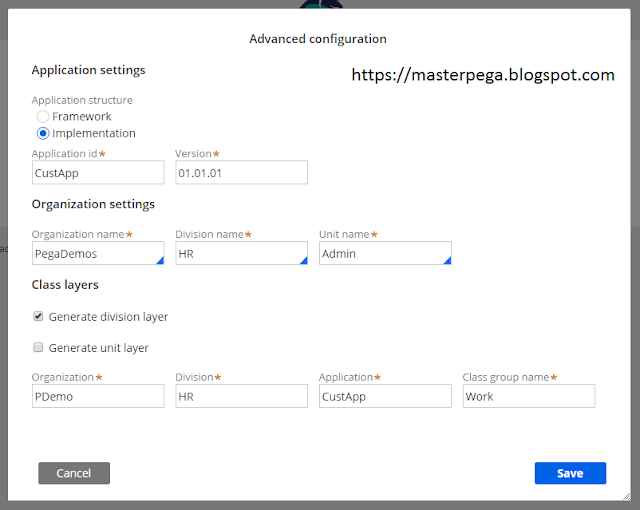
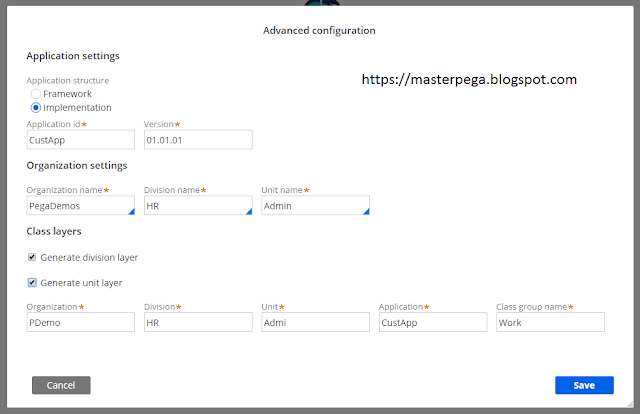
- Class Structure: Based on the application structure you selected, Class structure of application will vary as shown in images below
- Implementation application structure has further option to generate class structure based on division and units layer
Once advance configuration is completed, click save. and create application.
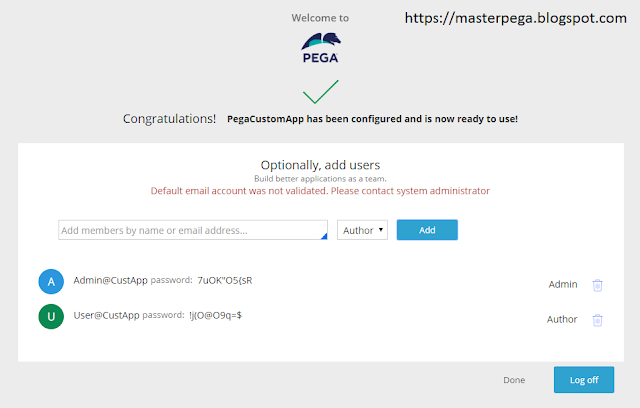
After you application is created, wizard will optionally ask you to add user. It will show 2 options to create operators for. Admin and Author.
We will create an admin id, at least, so that we can login to our newly created Pega 7.4 application
After creation of operators, Log off and sign in using new admin ID. As you are signing in first time, it will ask you to change your password. Once password it changed you can successfully login to your new custom application
Let us know your feedback in comment section below and If you like share this article with your friends, colleagues and social networks.


0 Comments